Wood Windows

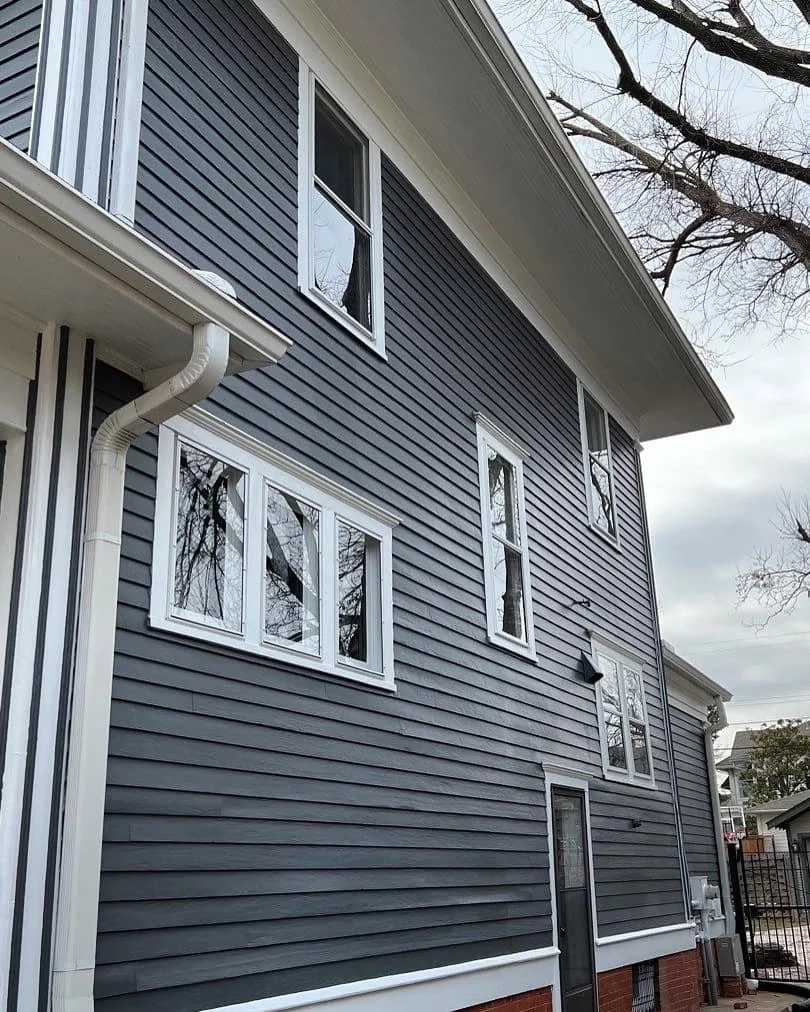
Are Storm Windows Approved by Historic Preservation?

Living in a Historic Preservation Neighborhood often does not allow for window replacement or it is difficult and expensive to replace your windows.

As your curtains are blowing from the drafts, winters are cold and summers are hot in your home, you might be considering it though.

What if we told you there was another way… a cheaper alternative that decreased utility costs, made your home comfortable, and didn’t involve ripping our your very expensive windows that are a character defining feature of the home? The answer is simply, storm windows. Not window replacement. Window replacement costs thousands while storm windows cost hundreds.

So are they approved by HP?

  • YES! IF THE GUIDELINES ARE FOLLOWED, STORM WINDOWS ARE TYPICALLY AN ADMINISTRATIVELY APPROVED ITEM IN HISTORIC PRESERVATION NEIGHBORHOODS.

  • STORM WINDOWS ARE CONVENIENT, AFFORDABLE AND SUSTAINABLE ALTERNATIVE TO REPLACEMENT

  • BELOW ARE THE HISTORIC PRESERVATION GUIDELINES FOR THE CITY OF OKLAHOMA CITY, CITY OF NORMAN, AND TULSA

Let’s take a look at Oklahoma City, Norman, and Tulsa

Oklahoma City

  • “Adding storm windows over historic wood or metal windows is a cost-effective approach that preserves the original window and provides energy savings equal to new replacement windows.”

  • Approval: Administrative Review

  • 3.6.23: Storm window frames must have narrow perimeter framing that conforms to the primary window opening

  • 3.6.24 Do not use unfinished or clear anodized aluminum frame storm windows

  • 3.6.25 Storm windows my have an integral screen component

  • 3.6.26 Interior storm windows are encouraged

  • City of Oklahoma Contact Page

  • Historic Preservation Guidelines

  • Historic Preservation Application

  • Neighborhoods: Heritage Hills, Heritage Hills East, Mesta Park, Jefferson Park, Paseo, Edgemere Park, Crown Heights, Putnam Heights, Shepherd

Norman

  • “Increase the thermal efficiency of historic buildings by observing appropriate traditional practices, such as weather stripping and caulking, and by introducing energy-efficient features such as awnings, operable shutters, and storm windows and doors, where appropriate”

  • Approval: Administrative Bypass

  • The use of interior storm windows is encouraged

  • 3.11.2a: Wood framed, full-light storms that are low profile and align with meeting rails of window

  • 3.11.2b: Relatively unobtrusive, narrow-profile, metal exterior storm windows that do not obscure the window itself… and that are finished in a painted or baked-enamel color compatible with the sash color are allowed. Storm window rails are to align with the meeting rails of the windows.

  • 3.17.1.a Unfinished or clear anodized aluminum storm finishes are not permitted

  • City of Norman Contact Page

  • Historic Preservation Guidelines

  • Historic Preservation Application

  • Neighborhoods: Miller Historic District, Chautauqua Historic District, Southridge Historic District

Tulsa

  • “Did you know that properly repaired historic windows have an R-value that’s nearly indistinguishable from high-end replacement windows? Repair your original windows, install proper weatherstripping, and add a good storm window system…”

  • Approval: Staff Approved

  • A.4.4 to gain thermal efficiency, storm windows which maintain the appearance and allow maximum visibility of the original historic windows may be installed. Unfinished and clear-finished metals are not allowed

  • Tulsa Preservation Commission Contact Page

  • Historic Preservation Guidelines

  • Historic Preservation Application

  • Neighborhoods: Maple Ridge, Brady Heights, Buena Vista Park, Carlton Place, Gillette, Owen Park, Riverside, Riverview, Yorktown, Swan Lake, Tracy Park, White City and Stonebraker Heights.

OLD HOME RESCUE IS PROUD TO OFFER OUR SERVICES IN OKLAHOMA & MORE!

OLD HOME RESCUE IS OKLAHOMA’S #1 STORM WINDOW AND DOOR INSTALLER!

WE FOCUS ON CREATING ENERGY EFFICIENT HOMES WITHOUT WINDOW & DOOR REPLACEMENT.

We have saved windows & doors from being replaced in Kansas, Oklahoma, Texas, and Missouri, were listed by The Craftsman Blog as “Preservation Rockstars”, and have been featured on HGTV’s Restore and Revive. 

Old Home Rescue is now proud to offer our energy efficient window and door solutions in Oklahoma City, The Village, Nichols Hills, Norman, Edmond, El Reno, Yukon, Moore, Mustang, Tulsa, Enid, Ponca City, Lawton, Ardmore, Bartlesville, Warr Acres, Bethany, and more!

We serve all of Oklahoma City, including nationally listed historic districts like; Heritage Hills, Mesta Park, Crown Heights, Jefferson Park, Paseo, Shepherd and more.

We serve all of Tulsa, including nationally listed historic districts like; Maple Ridge, Brady Heights, Buena Vista Park, Carlton Place, Gillette, Owen Park, Riverside, Riverview, Yorktown, Swan Lake, Tracy Park, White City and Stonebraker Heights.

We work closely with Oklahoma SHPO and Local Preservation Commissions to make sure all products and services are approved and receive a certificate of appropriateness. 

Unlike most window replacement companies, we specialize in NOT replacing your windows! Old Home Rescue’s products and services are designed to extend the life of your current windows.

Our window solutions use the best products available, like MonRay aluminum storm windows and doors, QUANTAPANEL aluminum storm windows, Pella aluminum storm doors, Provia aluminum storm doors, Indow Window acrylic interior storm windows, InnerGlass interior air panels, Allied aluminum storm windows, and traditional wood storm windows and doors.

Our goal is to improve the energy efficiency of any space without the need for low quality, high cost, double pane replacement windows, and our services and products are very affordable when compared to the lifetime cost of window replacement.

We encourage you to become our NEIGHBOR by scheduling an appointment.

Field Guide: Hardware for Double Hung Sash Windows

Installation of New Sash Hardware, Double Hung  

Your vintage windows need to lock! But what is the right way to get them to lock? How do close the gap and how do solve the most common problems? In this field guide and the video below we walk you through how to install a traditional sash lock and lift on a vintage wood window - a simple way to improve the beauty of an old home.

84021051_2440221562959661_1349066158434680832_n.jpg

Tools & Materials:

  • Lock & Keep

  • Lift

  • Sash lock shims

  • Measuring Tape

  • Pencil

  • Drill

  • 3/32” twist bit

  • 1/8“ twist bits

  • Flathead screwdriver - ratching screwdrivers will save your forearms!

  • Painter’s tape

Hardware Notes:

  1. Lock & keep are most commonly centered or matched with existing.

  2. Lift should be symmetrical and centered within a pane, when possible.

  3. Lift placement should be measured from the profile edge, not the stool.

  4. Windows 34”+ wide should have two locks and lifts installed to assist in smooth operation and pulling the meeting rails together for decreased air infiltration. 

Procedure:

  1. Old hardware holes should be filled with epoxy if they’re intended to be reused.

  2. Mark twist bits for the screw length with painter’s tape

  3. Find the center for the lock by measuring from the start of the profile on each side, dividing the measurement in half, and marking with a pencil on the lower check rail

  4. Align the keep centered on the mark with the based flush with the upper meeting rail. Pre-drill with a ⅛” twist bit

  5. Install keep with provided screws using a flathead screwdriver

  6. Align the lock centered with the keep and the exterior, flat surface flush with the edge of the lower meeting rail. Test to see if the lock will pull the meeting tight. Pre-drill with ⅛” twist bit. 

  7. Install lock with provided screws and flathead screwdriver

  8. Find center for the lift by measuring on center in the glass opening and mark

    • Pro Tip: Raise the lower sash and mark center on the lower rail based on the lock placement.

  9. Mark the height to be ½” below the lower rail profile edge. 

    • Pro Tip: A scrap piece of parting bead is perfect for gauging 1/2'‘ below the profile.

  10. Align the lift on the marks, you may be able to clamp with a pistol grip clamp

  11. Pre-drill lift with 3/32” twist bit. You’ll notice that’s different than the lock pilot holes, as the screws are different sizes.

  12. Install lift with provided screws and flathead screwdriver

Acceptable: Pilot holes are drilled to the appropriate size. When fastened, the lock pulls the check rails together. Screws are not marred and are installed by hand. 

Unacceptable: Screws are marred, installed with drill, or head is sheared. The lock does not pull check rails together or secure the window. 

Field Guide: Double Hung Window Installation

This in-depth guide (to be completed later) will take you from setup and removal of your historic, double hung wood windows to their re-installation.

While this post focuses on the mechanical work of the window, you can check out our other field guides to finish your window;

Below is a quick reference checklist. Click the image for up-to-date changes.

Wood Window Lock
from $14.99
Finish/Pack Size:
Quantity:
Add To Cart

Field Guide: Interior Window Painting

Below is the process that we have specifically developed with our local Sherwin Williams for our painters to restore the interior of old wood windows WITHOUT removing the sash from the window. Yes, it would be best practice to remove them; however, to do so is sometimes cost prohibitive. This is a method that will perform the needed maintenance on the windows, be eligible for Sherwin William’s lifetime warranty, and allows our Neighbors (we don’t have customers) to do much needed work on more windows.

If you do want to remove it to bare wood and deglaze, we highly recommend using a Speedheater over a heat gun and check out this video.

(For our process in Spanish click here)

The following process is for our on-site, interior window restorations and part of our Lifetime Exterior Renovation. This is the difference between putting color on a window and prepping & painting a window that we can all stand behind the quality of work. 

  1. Any products outside of those specified and provided must be approved by Old Home Rescue prior to use. 

  2. Follow Manufacturer’s Specifications on all products

  3. Clean the Surface

    1. Remove all surface contamination by using the following; 

      1. Walls should be wet down with garden hose & nozzle

      2. Mix 1 gallon water, 1 cup bleach, & 1 cup TSP-PF (Adjust for spray bottle if desired)

      3. Working in sections, clean from bottom to top to avoid streaks

      4. Rinse window and trim with water in spray bottle before solution dries

      5. Allow to dry until wood as 15% or less moisture level

  4. Prep the Surface

    1. Cover the work area with plastic or drop clothes to collect paint debris

    2. Scrape flat surfaces with a pull scraper to a sound layer removing existing loose, peeled or checked paint.

    3. Scrape profiles with a surfaces with a profile scraper to a sound layer removing existing loose, peeled or checked paint.

    4. Feather sand by hand any rough edges from peeling paint with a sanding pad to improve the final appearance and adhesion.

    5. Removal of old paint runs

    6. Set nail heads on wood where exposed beyond surface level

    7. Remove all unused fasteners & hardware

    8. Repair dry rot around around sash hardware with Abatron LiquidWood BEFORE priming.

    9. Repair rot with up to a golf ball sized quantity of Abatron WoodEpox BEFORE priming. Damage or rot exceeding epoxy threshold should be communicated to Old Home Rescue

    10. Repair minor cracks painter’s putty or wood filler AFTER spot priming.

    11. Caulking should be completed AFTER priming

  5. Glazing Repair

    1. If broken glass is present, continue with steps 5.2-5.4.

    2. Replace any broken glass with 1/8” double strength flat glass or reproduction wavy glass, as specified. Pin glass in place using glazing points with at least 2 glazing points on each side.

    3. Glass beds should be primed with oil based primer BEFORE glazing. 

    4. Putty glaze glass in with AquaGlaze

  6. Prime the Surface

    1. Brush the surface with 1-2 coats of Sherwin Williams Primer Rx Peel Bonding Primer

    2. Peel bonding primer helps even out less-than-perfect surfaces before painting, giving a smoother completed finish

    3. Air, surface and material temperature must be above 35 degrees for 4 hrs after application

  7. Caulk

    1. Gaps and fixed joints can be filled with Sherwin Williams PowerHouse or MaxFlex caulking after priming the surface

    2. Allow proper drying time before application of the finish

  8. Paint the Surface

    1. Brush the surfaces with 2 coats of Sherwin Williams Emerald, Waterbased Alkyd Urethane (different temperature requirements) or equivalent paints in a satin or semi gloss finish finish for ultimate protection. 

    2. OHR preferred sash brush: 2” angled ultra stiff sash brush

    3. Air, surface and material temperature must be above 35 degrees for 48 hrs after application

  9. Clean the surface

    1. Remove any paint from glass with a lubricated razor blade

    2. Clean glass with glass cleaner and paper towels

    3. Glass should be clean when viewed from 6 feet away

    4. Property should be clean of all construction debris and paint chips

    5. Trash can be disposed of at Old Home Rescue or construction dumpster on-site.

  10.  Notes on Painting Wood Windows

    1. The above specifications are for painting wood windows for stabilization, protection and maintenance on a cyclical basis. Window painting’s cosmetic results should be viewed from 5 feet away as there may still be inconsistencies in the paint surface. 

    2. If the Neighbor is interested in additional surface preparation or replacements parts to their window, direct them to the Old Home Rescue Project Manager, who will discuss off-site restoration or reproduction windows.

Field Guide: Exterior Window Painting

Below is the process that we have specifically developed with our local Sherwin Williams for our painters to restore old wood windows WITHOUT removing the sash from the window. Yes, it would be best practice to remove them; however, to do so is sometimes cost prohibitive. This is a method that will perform the needed maintenance on the windows, be eligible for Sherwin William’s lifetime warranty, and allows our Neighbors (we don’t have customers) to do much needed work on more windows.

If you do want to remove it to bare wood and deglaze, we highly recommend using a Speedheater over a heat gun and check out this video.

(For our process in Spanish click here)

Busik+Before.jpg
IMG-7293.jpg

The following process is for our on-site, exterior window restorations and part of our Lifetime Exterior Renovation. This is the difference between putting color on a window and prepping & painting a window that we can all stand behind the quality of work. 

  1. Any products outside of those specified and provided must be approved by Old Home Rescue prior to use. 

  2. Follow Manufacturer’s Specifications on all products

  3. Clean the Surface

    1. Pressure washers are NOT used to prep for paint application

    2. Remove all surface contamination by using the following; 

      1. Walls should be wet down with garden hose & nozzle

      2. Mix 1 gallon water, 1 cup bleach, & 1 cup TSP-PF

      3. Working in sections, clean from bottom to top to avoid streaks

      4. Rinse walls with garden hose and nozzle before solution dries

      5. Allow to dry until wood as 15% or less moisture level

  4. Prep the Surface

    1. Cover the work area with plastic or drop clothes to collect paint debris

    2. Existing loose, peeled or checked paint must be scraped with a pull scraper to a sound layer. 

    3. Feather sand any rough edges from peeling paint with a sanding pad to improve the final appearance and adhesion.

    4. Removal of old paint runs

    5. Set nail heads on wood where exposed beyond surface level

    6. Remove all unused fasteners & hardware

    7. Repair rot with up to a golf ball sized quantity of Abatron WoodEpox BEFORE priming or a primed replacement board. Damage or rot exceeding epoxy threshold should be communicated to Old Home Rescue

    8. Repair minor cracks with Aqua Glaze or exterior painter’s putty AFTER spot priming.

    9. Caulking should be completed AFTER priming

  5. Glazing Repair

    1. Replace any broken glass with 1/8” double strength flat glass or reproduction wavy glass, as specified. Pin glass in place using glazing points with at least 2 glazing points on each side.

    2. Remove failed glazing that cannot be maintain from the glass bed. Protect historic glass, ensuring not to break any additional glass.

    3. Glass beds should be primed with oil based primer BEFORE glazing. 

    4. Putty glaze glass with Aqua Glaze

    5. Fill cracks in glazing with Aqua Glaze

  6. Spot Prime

    1. Spot prime bare wood with oil based primer 

    2. Sand as needed between coats.

    3. Air, surface and material temperature must be above 35 degrees for 4 hrs after application

  7. Prime the Surface

    1. Brush the entire surface with 1-2 coats of Sherwin Williams Primer Rx Peel Bonding Primer

    2. Peel bonding primer helps even out less-than-perfect surfaces before painting, giving a smoother completed finish

    3. Air, surface and material temperature must be above 35 degrees for 4 hrs after application

  8. Caulk

    1. Gaps and fixed joints can be filled with Sherwin Williams PowerHouse or MaxFlex caulking after priming the surface

    2. Allow proper drying time before application of the finish

  9. Paint the Surface

    1. Brush the surfaces with 2 coats of Sherwin Williams Emerald, Waterbased Alkyd Urethane (different temperature requirements) or equivalent paints in a satin or semi gloss finish finish for ultimate protection. 

    2. OHR preferred sash brush: 2” angled ultra stiff sash brush

    3. Air, surface and material temperature must be above 35 degrees for 48 hrs after application

  10. Clean the surface

    1. Remove any paint from glass with a lubricated razor blade

    2. Clean glass with glass cleaner and paper towels

    3. Glass should be clean when viewed from 6 feet away

    4. Property should be clean of all construction debris and paint chips

    5. Trash can be disposed of at Old Home Rescue or construction dumpster on-site.

  11.  Notes on Painting Wood Windows

    1. The above specifications are for painting wood windows for stabilization, protection and maintenance on a cyclical basis. Window painting’s cosmetic results should be viewed from 5 feet away as there may still be inconsistencies in the paint surface. 

    2. If the Neighbor is interested in additional surface preparation or replacements parts to their window, direct them to the Old Home Rescue Project Manager, who will discuss off-site restoration or reproduction windows.

Click the image below for an up-to-date checklist!

Field Guide: Painting Old Wood Windows Overview

Once upon a time, before Old Home Rescue, we were Wood Window Rescue. We’ve spent the years, scraping every last piece of paint, reglazing each panes, and re-roping windows. I’ll be honest, even as a professional, sometimes it’s hard. It’s a common topic at our window restoration workshops as well as Facebook groups like Our Old House. What we’ve learned, and now stress, to our Neighbors is that there is a time and a place for window restoration. Sometimes it’s best for your time, your marriage (seriously), and your windows to just perform paint maintenance.

Below is the process that we have specifically developed for our painters to paint old wood windows WITHOUT removing the paint to bare wood or the window from the opening. Yes, it will have continue to have the character of an old home, but when viewed from the sidewalk, the paint will look amazing and be eligible for Sherwin Williams’s lifetime warranty. If you do want to remove it to bare wood and deglaze, we highly recommend using a Speedheater over a heat gun and check out this video.

(For our process in Spanish click here)

Busik+Before.jpg
IMG-7293.jpg

The following process is intended to be the final step in a Lifetime Exterior Renovation. This is the difference between putting color on a house and prepping & painting a home where we can all stand behind the quality of work. 

  1. Any products outside of those specified and provided must be approved by Old Home Rescue prior to use. 

  2. Follow Manufacturer’s Specifications on all products

  3. Clean the Surface

    1. Pressure washers are NOT used to prep for paint application

    2. Remove all surface contamination by using the following; 

      1. Walls should be wet down with garden hose & nozzle

      2. Mix 1 gallon water, 1 cup bleach, & 1 cup TSP-PF

      3. Working in sections, clean from bottom to top to avoid streaks

      4. Rinse walls with garden hose and nozzle before solution dries

      5. Allow to dry until wood as 15% or less moisture level

  4. Prep the Surface

    1. Cover the work area with plastic or drop clothes to collect paint debris

    2. Existing loose, peeled or checked paint must be scraped with a pull scraper to a sound layer, i.e., must pass the fingernail test for failed paint. 

    3. Feather the rough edges from peeling paint to improve the final appearance and adhesion.

    4. Removal of old paint runs

    5. Set nail heads on wood where exposed beyond surface level

    6. Remove all unused fasteners & hardware

    7. Repair rot with up to a golf ball sized quantity of Abatron WoodEpox BEFORE priming or a primed replacement board. Damage or rot exceeding epoxy threshold should be communicated to Old Home Rescue

    8. Repair minor cracks with Aqua Glaze or exterior painter’s putty AFTER spot priming.

    9. Caulking should be completed AFTER priming

  5. Glazing Repair

    1. Protect historic glass by replacing missing glazing with Aqua Glaze and only removing glazing that fails the fingernail test. Glass beds should be primed with oil based primer BEFORE glazing. 

    2. Fill cracks in glazing with Aqua Glaze

  6. Spot Prime

    1. Spot prime bare wood with oil based primer 

    2. Air, surface and material temperature must be above 35 degrees for 4 hrs after application

  7. Prime the Surface

    1. Brush the surface Sherwin Williams Primer Rx Peel Bonding Primer

    2. Peel bonding primer helps even out less-than-perfect surfaces before painting, giving a smoother completed finish

    3. Air, surface and material temperature must be above 35 degrees for 4 hrs after application

  8. Caulk

    1. Gaps and fixed joints can be filled with Sherwin Williams PowerHouse or MaxFlex caulking after priming the surface

    2. Allow proper drying time before application of the finish

  9. Paint the Surface

    1. Brush the surfaces with 2 coats of Sherwin Williams Emerald, Waterbased Alkyd Urethane (different temperature requirements) or equivalent paints in a satin or semi gloss finish finish for ultimate protection. 

    2. Air, surface and material temperature must be above 35 degrees for 48 hrs after application

  10. Clean the surface

    1. Remove any paint from glass with a lubricated razor blade

    2. Clean glass with glass cleaner and paper towels

    3. Glass should be clean when viewed from 6 feet away

    4. Property should be clean of all construction debris

    5. Trash can be disposed of at Old Home Rescue or construction dumpster on-site.

  11.  Notes on Painting Wood Windows

    1. The above specifications are for painting wood windows for stabilization, protection and maintenance on a cyclical basis. Window painting’s cosmetic results should be viewed from the sidewalk as there will be inconsistencies in the paint surface. 

    2. If the Neighbor is interested in additional surface preparation or results, direct them to the Old Home Rescue Project Manager, who will discuss on-site restoration, off-site restoration, or reproduction windows.

The Best Window Putty

If you are replacing or repainting vintage windows, you will find yourself needing to replace the old glazing. Sometimes the glazing will just need to be touched up and other times, you’ll be looking at replacing all of the glazing. Now, the question that comes up at this point is which glazing should you use?

Throughout this blog and video, we will discuss the top brands used for window glazing. We also will let you know which glazing we use in our wood window rescue shop. 


The Box Store Option: DAP 33

DAP 33 glazing is a ready-to-use glazing compound that may be used for face glazing wood or metal sashes. Its knife-grade consistency allows for smooth, easy applications. It also sticks tightly to the glass and sash while resisting sagging, shrinking, and cracking. This product is designed for both interior and exterior use. Just make sure to wait the recommended 7-14 days before painting this glazing...that will change based on temperatures and humidity. 

With the primary ingredients consisting of limestone, soya oil, talc, and quartz:  there are no caustic chemicals in this glazing compound. However, minor safety precautions still need to be taken. Be smart and always read the label! 

DAP 33 Glazing is also really easy to find! Not only can you find it in big box stores and paint supplies; DAP is available online and in most local home stores. It is definitely accessible for anyone needing glazing! Averaging about $30 per gallon, the DAP 33 glazing compound does its job!

Red Devil Window Glazing Compound

Red Devil is listed as a premium white, oil based glazing compound that is specially formulated for installing glass in wood or metal sashes. The glazing forms an airtight and watertight seal and is designed to take any paint after 24 hours. Its primary ingredients are calcium carbonate, soybean oil, talc and titanium dioxide. 

Though we have not personally seen Red Devil glazing products in any of our stores, we do know that it is carried at dozens of retailers across the US and can be purchased on Amazon..typically for around $30 per gallon.

Sarco Type-M

Sarco Multi-Glaze Type-M glazing compound is formulated for wood sash windows and doors. Type-M is for inside shop glazing. This modern glazing compound remains elastic which allows for normal expansion and contraction. It also adheres to all glazing surfaces thus forming a permanent, watertight bond between the glass and sash. After the putty has skinned, it should be ready to be painted with an oil or latex paint. This drying period will depend on temperatures and humidity.

The Sarco Type-M primary ingredients from the SDS sheet are calcium carbonate, ground limestone, linseed oil and soybean oil. Type-M is also a bit harder to find then the previous two options, but still pretty easy to track down. You can purchase this glazing compound on Amazon and several other window restoration supplies online. Usually found online for about $40 per gallon.

UGL Glazol

Superior to putty, UGL Glazol glazing compound is specially designed to create a watertight bond between glass and wood, glass and metal sash, and glass and doors. It forms a “cushion” against shock and vibrations when used in replacing broken glass. Glazol is ideal for knife-grade caulking compound and can be used to set plumbing fixtures along with fill cracks and nail holes in wood siding. This glaze offers a year-round workability by remaining pliable while resisting chipping and cracking. 

When it comes to painting this glaze, you’ll want to be mindful of what type of paint you are applying, as it has unique drying time recommendations.  While using latex paint, you’ll be waiting several days before applying any coats. If using oil based, it recommends 24 hours.  

You’ll also want to be careful with this putty as its primary ingredients contain Stoddard Solvent. That is a flammable liquid that smells and tastes like kerosene. It also contains Limestone and Soybean Oil. 

UGL Glazol can be found at about $35 a gallon on Amazon.

Our Personal Favorite

After testing all of these putty options, our favorite has to be the Sarco – Type M Glazing Putty! We love this glazing compound and their business. This glazing is professional grade and the owners give it a personal touch!  

Have a question? Leave a comment below!

Picking the Best Sash Lock

Your vintage windows need to be able to lock...but what lock should you choose? Where can you buy locks? 

In this blog and the videos, we will review 3 different types of locks that have been used by Old Home Rescue.

The Box Store, Budget Lock:  The Everbilt, Steel Window Lock

The Everbilt is the first lock that Ty mentions in the video. This lock can be found in almost all big, hardware box stores such as Home Depot or Lowe’s. They can also be found at your local hardware store, which is great if you’re in a pinch for an affordable lock! However, the hardware store lock is fairly low in quality.

From our experience, we have learned that the steel finish fails quickly from just the slightest wear. When our team used them, they became damaged during the installation process. The Everbilt locks also are light in weight, which gives us some concerns about how secure they are.

The Big, Beautiful Sash Lock: The SRS Solid Brass Lock

The SRS lock is an updated design from the traditional Fitch pattern and it incorporates a lever. The lever is enlarged to operate smoothly and with ease. With a narrow strike, this lock is an excellent choice for insulated sash units. A forged brass base, lever and strike with an internal stainless steel mechanism are some of the attractive features of the SRS Lock. 

SRS Hardware is an online supplier of premium hardware and we know that everything from them is of the highest quality. The owners are members of the Window Preservation Alliance and they support local window restoration companies nationwide. 

From our experience with the SRS Lock, we do notice that the finish does tarnish over time but can easily be polished and restored. We do like that this lock is from a niche window hardware supplier that is able to have matching finishes for all your window hardware types. We also want to point out that this lock is larger than your standard lock and the price is higher than the other locks mentioned in this blog. 

The Simple, Vintage Sash Lock: Traditional Sash Lock

The Traditional Sash Lock is a reproduction of common sash locks from 1910-1940. It is made of solid brass and comes in brass, antique brass, brushed nickel and oil rubbed bronze. It’s a sturdy lock that will last forever. The lock itself is smooth and will lock tight enough to pull the meeting rails together. 

We tried dozens of locks prior to coming across the traditional sash lock. We searched high and low on places like Amazon and other sites. We are pleased to have found a lock that does what it’s supposed to do without being too showy. For the price and sturdiness, we have found the traditional lock to be the best suite for us at Old Home Rescue. 

Wood Window Lock
from $14.99
Finish/Pack Size:
Quantity:
Add To Cart

Want to learn how to install your locks? Check out the next video to learn a step by step approach to installing your window locks!

You can order the traditional sash lock mentioned early in the blog by going to our online store! Just click this link!

 Have a question? Leave us a comment below!